

Back in 2021, I was approached by a dear friend to make a quilt for her lovely daughter. We wanted to keep it simple and make something that featured some lovely colourful Jaipuri fabrics and prints. So, we pored over some Pinterest inspirations, and looked at fabric samples, and this chevron or zigzag quilt started to take shape! On a side note, the quilt itself has a wild story - before I could finish it in 2021, we ended up finalizing our move from New Delhi, India to Brisbane, Australia and couldn't bring the in-progress quilt with us. About a year later, a friend agreed to bring it with her to Sydney, Australia, where it was picked up by my lovely sister-in-law and we finally got it to Brisbane by 2022. I finished the quilt in August 2022, and my parents, who were visiting us in Brisbane at that time, took it back with them to New Delhi for that special (very patient!) little girl. What a journey!
This twin sized zigzag, or Chevron quilt is made entirely of HSTs. It finishes at 66" by 84" (168cm by 213cm). It comes together quickly and lends itself beautifully for some of those hand-quilting touches that make a quilt oh-so-special. Here's what you need:
Fabric:
Oranges - 4 FQs*
Pinks - 5 FQs*
Yellows - 4 FQs*
White (background fabric) - 2.5yds or 2.5m
*A FQ or fat quarter is a pre-cut fabric, measuring approximately 18" by 22", you can also use 1/4 yd or 1/4m if you choose!
I purchased my fabrics from Fabriclore and Fabcurate, both are fantastic sites with a selection of Jaipuri cottons. While the exact fabrics from this project are no longer available, they still have some lovely fabrics that would work together really well.
Other supplies:
Sewing machine and 1/4" foot (we will use a 1/4" seam allowance)
A rotary cutter and cutting mat (or a pair of fabric scissors)
A quilting ruler (you can use a regular ruler, but it can make trimming your square blocks a bit of a challenge).
Pencil or pen to mark your fabric.
You can hand sew this quilt-top, you will need needles + thread for that!
Let's get cutting!

To begin with, press all your fabric - this makes it so much easier to cut.
From the Oranges and Yellows FQs, cut [22] 7" squares for each colour way. The way I did this was to cut [6] 7" squares out of 2 of the fabric options, and [5] out of the remaining 2 fabric options of the same colour.
From the Pinks FQs, cut [33] 7" squares. The way I did this was to cut [7] 7" squares out of 3 of the fabric options and [6] 7" squares out of the remaining 2 pink fabric options.
Finally, cut [77] 7" squares out of your white fabric.
You can make this quilt super 'scrappy', just grab the correct number of fabric squares in each colour way from your scrap fabric stash and you're all set! i.e., you will need [22] 7" yellow squares, [22] 7" orange squares, [33] 7" pink squares, and [77] 7" white squares.
Let's get sewing: HSTs or Half Square Triangles
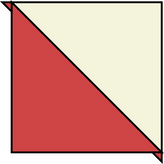
Take [1] 7" orange square and [1] 7" white square. Place them right sides together. Draw a diagonal on the back of one of the squares.
Pin to secure the two pieces of fabric together. Sew two lines on either side of the marked diagonal line with a ¼" sewing margin.
Next, STOP! Press your freshly sewn double square to get rid of any fabric bulges. Remember to press down and not iron.
Cut along the diagonal.


Open along the seam and press your HSTs. Using your quilting ruler, trim to measure 6.5" square. To get perfect points, line up the diagonal on your quilting ruler with the diagonal of the block when you trim!
Congratulations! You've made 2 Half Square Triangle or HST blocks.
Repeat to make HSTs with your remaining squares.
This is a great spot to do some chain piecing! Chain piecing is when you prep all your fabric square sets and sew them one after the other without breaking the thread. It speeds up this part of making the quilt.
At this point, you will have [44] orange-white HSTS, [44] yellow-white HSTs, and [66] pink-white HSTs. Each of your HSTs should measure 6.5" square.
Let's make some blocks

Next, we'll sew our HSTs into co-ordinating chevron or zigzag blocks.
Separate your HSTs into sets of 4 of the same fabric. You should have [35] sets of 4 - [10] orange, [10] yellow, and [15] pink.
You will have [14] HSTs leftover - [4] orange, [4] yellow, and [6] pink.
We will make a chevron or zigzag block from each set of 4.
From one set of 4 HSTs, take 2 HST blocks and sew them together as shown below to form one part of our zigzag block. This type of block is also known as a "flying geese" block. Press your seam.
To get those sharp points, try to pin along the diagonal seam of the HSTs, and sew slowly.

Take the remaining 2 HST blocks and sew them together as shown below to form an inverse "flying geese" block. Press your seam in the opposite direction to the blocks you made in the previous step.

Sew the two "flying geese" blocks together as shown below to make one chevron or zigzag block.

At this stage you can check that your zigzag squares measure 12.5" by 12.5". Ensuring that the squares are 12.5" by 12.5" can mean better accuracy when sewing your blocks together. This step is optional, and your quilt will be amazing regardless!

TIP: If you have pressed your flying geese blocks in opposite directions, your seam in the middle will "nest" neatly. To the right is a photo of nesting seams from another project (the Mosaic Tile quilt pattern!) to illustrate this.
Make zigzag blocks with the remaining [34] sets of 4 HSTs. You will have [35] zig zag blocks - [10] orange, [10] yellow, and [15] pink.
Next, we'll make our end blocks
The ends of each row are half chevron blocks, so our zigzag pattern ends on a 'down' turn.
Divide your [14] leftover HSTs leftover ([4] orange, [4] yellow, and [6] pink) into sets of [2] HSTs. You will have [7] sets - one for each row.
Take one set of [2] HSTs and make your end blocks as shown below:

Repeat with the other sets of [2] HSTs.
Give all your blocks another press so they are ready for our next step!
Let's sew our blocks into rows
Now we'll make our zigzag rows. There are [5] zigzag blocks + [1] end block in each row. In this quilt there are two orange rows, two yellow rows, and three pink rows in this order: orange - pink - yellow - pink - yellow - pink - orange. With the fabrics I have used in this quilt, to me this order and layout appeared to be the most balanced.
You might prefer something slightly different - that's okay! This is a good time to lay out all your blocks in rows so you can be sure of the colour placement of each block and colour. Once you're happy with it all, make sure you take a photo.

The photo above is an example of how I chose to place my yellow blocks (please excuse the photo, I was making this at night and laid it out on my bed! Not the most aesthetically pleasing, but it got the job done).
Finishing your quilt
Finally, sew your rows together to make your quilt top, and you're done! Finally, we'll baste, quilt, and bind this quilt. For tips on finishing your quilt, you can read my blog post series about it.

I chose yellow backing and pink binding for this quilt, to stick to the theme, but also keep it super light and fun.
I went with cotton batting (with scrim) for the batting - Jaipuri fabrics are quite a light and loose weave and make for gorgeous summer quilts; the cotton batting keeps things nice and light, making this the perfect quilt for those cool summer nights.
Backing, batting, and binding fabrics are from Spotlight stores in Australia.
Quilting details

I quilted this on my home machine with a dual feed foot, echoing the zigzag pattern of the quilt top. To add a personal touch to this quilt, I added some hand quilting stitches. I used multi-colour cotton quilting thread, with my stitches going in the opposite direction to the zigzag pattern of the quilt to make the whole thing 'pop'.
Enjoy your new quilt! Leave a comment below if you liked this tutorial, or if you are planning to make the quilt. And make sure you share photos on social media with the tag #zigzagquilt and #cecesquiltsandthings
Happy Quilting!
Comments